Print | posted on Tuesday, August 21, 2018 12:21 PM
[update] if you use OneDrive to store your Documents – the default on a new install of Windows 10 - you must ensure the WindowsPowerShell folder exists and is set to be “always on this device”.
Ahh, SharePoint. Ahh, SnapIns. Yeah. 2009 faxed and before the ink faded, told us the old crap is hanging around like a bad hangover. I hate SnapIns more than most, but that’s a story for another day. For the time being we are stuck with them when working with our “built from the cloud up” versions of SharePoint Server.
One of the more esoteric problems with SnapIns is a total lack of portability. In many situations you want to author scripts without being on a virtual machine that has SharePoint installed. In these days of “modern” we are mostly doing this in Visual Studio code to take advantage of the reasonably nice PowerShell authoring experience and of course the integration with GitHub and so on. Plus, fancy colours.
Thus, how can we get some additional help when authoring? What we need is a “mock” or a “stub” of the SharePoint cmdlets so we can get intellisense.
Thanks to the nice chaps who made the SharePoint DSC resources, we can do this easily by grabbing the stub they made (as a Module) and adding it to our PowerShell Profile. We used to do a similar thing back in the day by adding the SnapIn to the PoSh Profile to avoid having to load it when opening up ISE.
First thing to do is grab the stub(s). They are included in the SharePointDsc project on GitHub. However, there is no need to grab the whole thing – you can just get the SharePoint 2016 version from here. There is also a SharePoint 2013 version here. Save that bad boy on your machine someplace sensible. I put it in my _ScriptLibrary folder which lives in my OneDrive. Note there is also a stub for Distributed Cache which lives here.
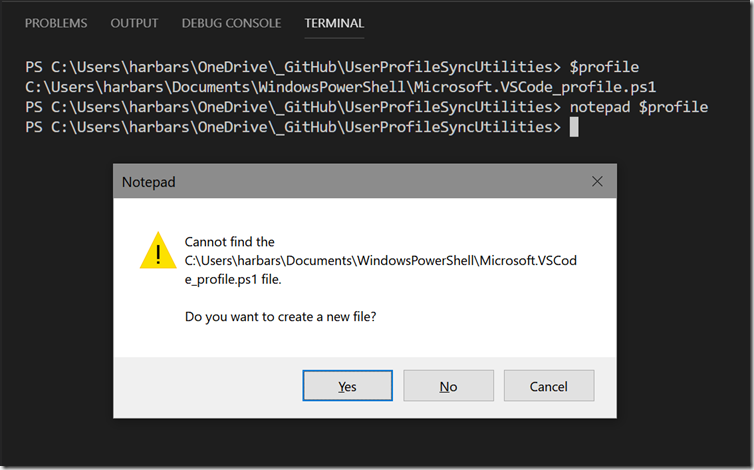
Now you have the stub we can add it to our PowerShell profile. Open up VSCode and make sure you are in a PowerShell session. Go to the Terminal and type $profile. This will display your current profile file location.

By default that file doesn’t exist yet so the simplest way to create it is to type notepad $profile, which will open up Notepad and prompt you to create it.

Then simply Import the module using the path to the stub file, my profile looks like this:
# SharePoint 2016 Stub
Import-Module "C:\Users\harbars\OneDrive\_Script Library\Microsoft.SharePoint.PowerShell.psm1"
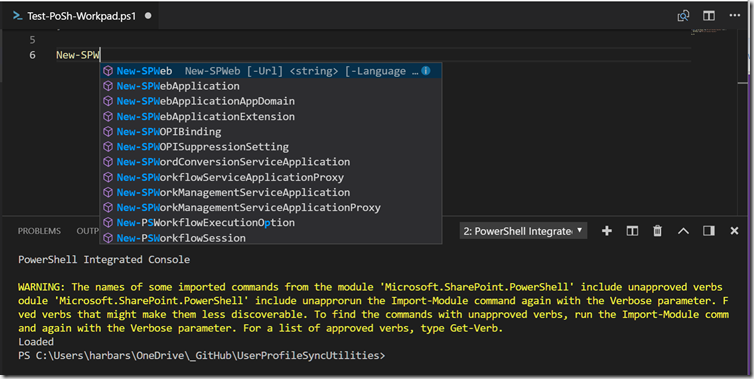
Save that file and close Notepad. The next time you open a VSCode PowerShell session the module will be imported and you will see a lovely warning about the made up verbs the SharePoint development team thought would be OK back in 2008! Chortles.
But never mind that (for the time being) we now have intellisense for the SharePoint cmdlets.

I actually tweak the profile a little so the warning is removed, and I add a message to say the Stub was loaded.
# SharePoint 2016 Stub
Import-Module "C:\Users\harbars\OneDrive\_Script Library\Microsoft.SharePoint.PowerShell.psm1"
Clear-Host
Write-Output "SharePoint Stub Loaded"

Just a simple trick to get the SharePoint cmdlets on a machine without SharePoint installed. Enjoy. And don’t go making up any verbs! :)
s.