Print | posted on Thursday, August 28, 2025 12:20 PM
Back before things ‘moved on’ Microsoft invested quite heavily in self contained scenario based documentation. They didn’t always get it right, but that was generally how things were approached. Now, with Microsoft Learn the approach seems to be extremely feature specific articles that both explain concepts and provide sample scripts or API documentation. This totally makes sense given the fast paced change and the even faster introduction of new capabilities. Microsoft Learn in general is an exceptional resource. And it totally makes sense for those creating the documentation. The problems start when trying to get stuff done, and following the trail of breadcrumbs to come up with a concise and repeatable work item.
The very nature of the extensive Microsoft cloud platform means that most things of any significant merit involve many different component parts, all managed using different APIs, PowerShell Modules and often with overlapping configuration across multiple ‘products’. For things to work, all the configuration needs to be present and correct, and in many cases done in the right order. A perfect scenario for a playbook (again) and decent RBAC based operational service management discipline.
A great example of this is configuring everything necessary to support Microsoft Purview Sensitivity Labels for Containers. Containers being Microsoft Teams Teams, SharePoint Sites and Office 365 Groups. Oh, and Loop Workspaces – :) – yeah, me neither.

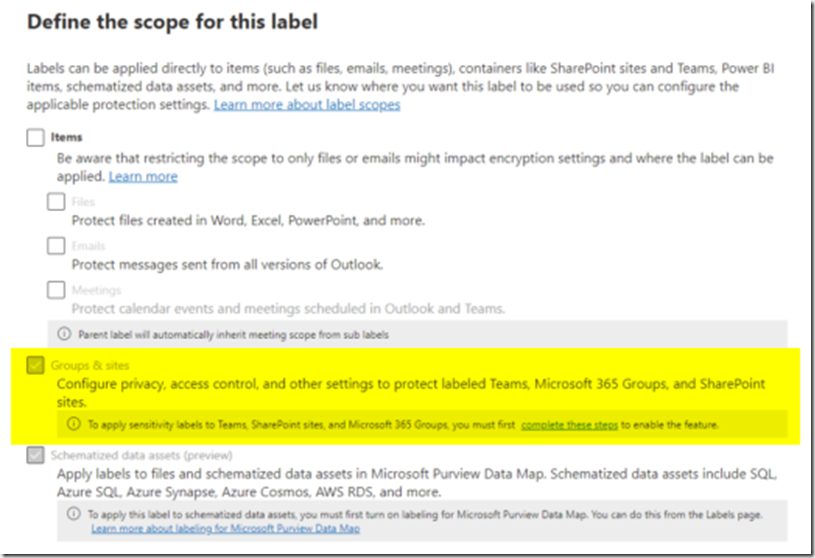
A great feature, but one that can’t be configured in Purview, without some prerequisites in place within your Entra, and Exchange Online first. We will see it greyed out with a link to the documentation I’m moaning about:

None of this is particularly difficult or new and experienced administrators know it well. But I’ve been asked about it six times in the last three months. It’s of course something that most people will only do once (per tenant) and then forget about.
It’s also a lot easier to quickly describe the steps to someone who knows what the difference between AD PowerShell and Graph is, that they exist, and the difference between REST and RPS – all assuming they even grok managing things with the console in the first place. There are a LOT of administrators out there that live in the portals!
The Microsoft Learn documentation covers all of this. However it does so by means of five (yes five) different web pages. There is no “process” to follow, it’s up to you to figure out the relevant parts of each, whilst also dealing with a bunch of open browser tabs. Also two of the pages contain overlapping/contradictory information, and one of them contains incorrect, out of date information regarding a deprecated API.
How wonderful, if only someone in the community would put together a walkthrough (and not as an interminably annoying YouTube video, no I don’t want to click like and subscribe). Funnily enough, that’s exactly what Antonio Maio did back in 2023. Antonio is the man. Except that was 2023. Things have changed (not in terms of concepts or what’s happening, but in terms of the APIs etc).
This is the nature of the beast with cloud, and a significant challenge for content authors (to keep things up to date, but also to explain the old and new ways).
At any rate, I thought I’d put together the current sequence of things in a rational format – correct as of August 2025. I will attempt to keep this up to date, if and when things change. Works in PoSh ‘proper’ and Azure Cloud Shell.
The first step is to install/import a few modules that we will need:
Install-Module Microsoft.Graph -Scope CurrentUser
Install-Module Microsoft.Graph.Beta -Scope CurrentUser
Import-Module ExchangeOnlineManagement
Then we connect to Graph (you will be prompted to authenticate either via a browser pop up or a device code if using Cloud Shell).
Connect-MgGraph -Scopes "Directory.ReadWrite.All"

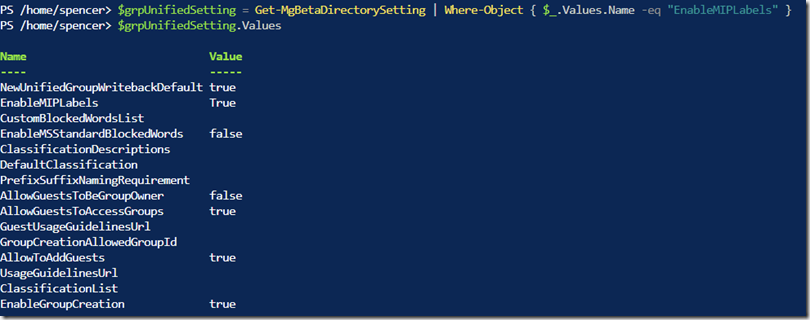
Then grab our Unified Groups directory settings, querying it for the EnableMIPLabels property.
$grpSetting = Get-MgBetaDirectorySetting | Where-Object { $_.Values.Name -eq "EnableMIPLabels" }
$grpSetting.Values
If this returns nothing, then we need to create and set that property.
$TemplateId = (Get-MgBetaDirectorySettingTemplate | where { $_.DisplayName -eq "Group.Unified" }).Id
$params = @{
	templateId = "$TemplateId"
	values = @(
	@{
		name = "EnableMIPLabels"
		value = "True"
	}
	)
}

New-MgBetaDirectorySetting -BodyParameter $params
We can query this has worked by getting it again:
$grpSetting = Get-MgBetaDirectorySetting | where { $_.DisplayName -eq "Group.Unified"}
$grpSetting.Values

Then we need to connect to Exchange Online using the Security and Compliance PowerShell module. This is the one that Microsoft documents incorrectly due to the deprecation of RPS. The cmdlet is the same, the parameters are not.
Connect-IPPSSession
Note: this works only for commercial tenants – other tenant types require additional parameters
Then we can sync the labels between Purview and the Directory/Exchange:
Execute-AzureAdLabelSync
Now we can go back to Information Protection in the Purview Admin portal and get busy making labels and publishing their associated policies.
It’s also important to note that for all this to work – that is for the labels to actually show up – we must have the Azure Information Protection service up and running in our tenant. That requires another PowerShell module and command:
Install-Module -Name AIPService
Enable-AipService
After publication of the labels, they will show up in your Teams etc. Note it may take up to 24 hours for everything to be fully happy. In my experience for small environments it’s more like a couple hours. But in large environments 24 hours is a reality.
Have fun with sensitivity labels!