Print | posted on Tuesday, May 6, 2008 1:51 AM
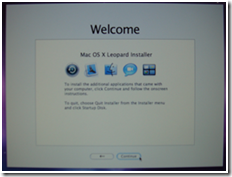
- On the Welcome page, click Continue.
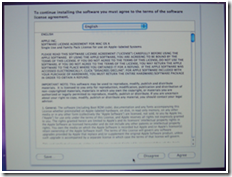
- Click Agree to agree to the license agreement – or if you’re mental, read the EULA then click Agree.
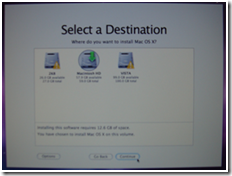
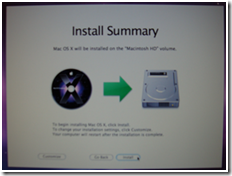
- On the Select a Destination page, select the Macintosh HD partition and click Continue.
- On the Install Summary page click Customise, and select any options you may want from the Bundled Applications node and click Done.
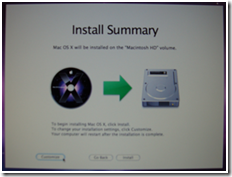
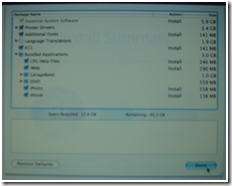
Note you can save space by removing any languages you do not need.
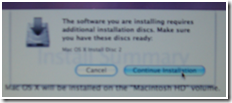
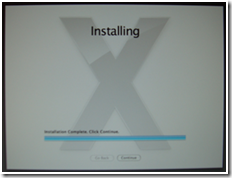
- On the Install Summary page, click Install and when prompted click Continue Installation.
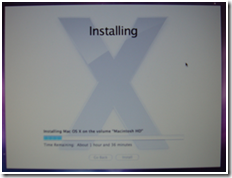
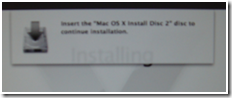
- Wait while Mac OS X is installed – this will take about an hour and thirty minutes, with the installer prompting you for disk 2 after about an hour. So go do some real work :).
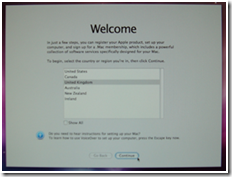
- Once Mac OS X is installed, click Continue and wait while the silly Welcome video plays out.

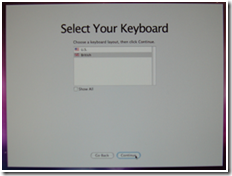
- You will then be guided through a number of screens to configure and register your Mac – these are the same steps you would have completed when you first turned on your Mac. Don’t forget you can skip registration by hitting Command-Q and then Skip on the Registration Information page. (Not all screens are shown below)
- When you are done, the Mac OS Desktop will load and you will notice the three hard disk icons on the right hand side.

At this stage the Mac OS X installation is complete and you could choose to install your other apps, run Software Update or restore from a backup your data etc. For the purposes of brevity we won’t bother and will carry on setting up our other partitions.
Continue to Part Three: Installing Windows Server 2008